
WolphiLink Android Interface: Facilitating portable PSK, RTTY & SSTV operations

The WolphiLink interface truly is a great addition to any portable setup: The device is just a little bit larger than a matchbox but enables users to fully operate popular digimodes such as RTTY and PSK as well as SSTV. The really great thing about the WolphiLink interface is that it does not require a PC or laptop. It is designed to be used with Android devices and since pretty much everybody carries a smartphone at all time there is no need for other additional equipment. In total, the WolphiLink interface adds just around 80 grams (incl. cables) to your portable rig.
Required Hardware & Android Apps

DroidSSTV Android app
When it comes to the hardware the WolphiLink interface can be obtained via the Wolphi LLC website. When I ordered it back in June 2016 its price was 39.99 USD. Together with a 3ft 4pin 3.5mm cable (7.99 USD), a 3ft 6pin mini DIN cable (8.99 USD) and shipping to Austria (15.50 USD) I paid 72.47 USD in total.
Regarding the software Wolphi LLC provides the necessary fee-based Android apps via Google Play Store. Instead of one single app the manufacturer distributes self-contained apps for each of the supported modes. So, in case you want to operate RTTY, PSK and SSTV you would need to buy and install three apps, namely DroidRTTY, DroidPSK and DroidSSTV which are about 7 to 9 USD each. Also, Wolphi LLC provides RX only apps for decoding weather fax charts or Navtex messages.
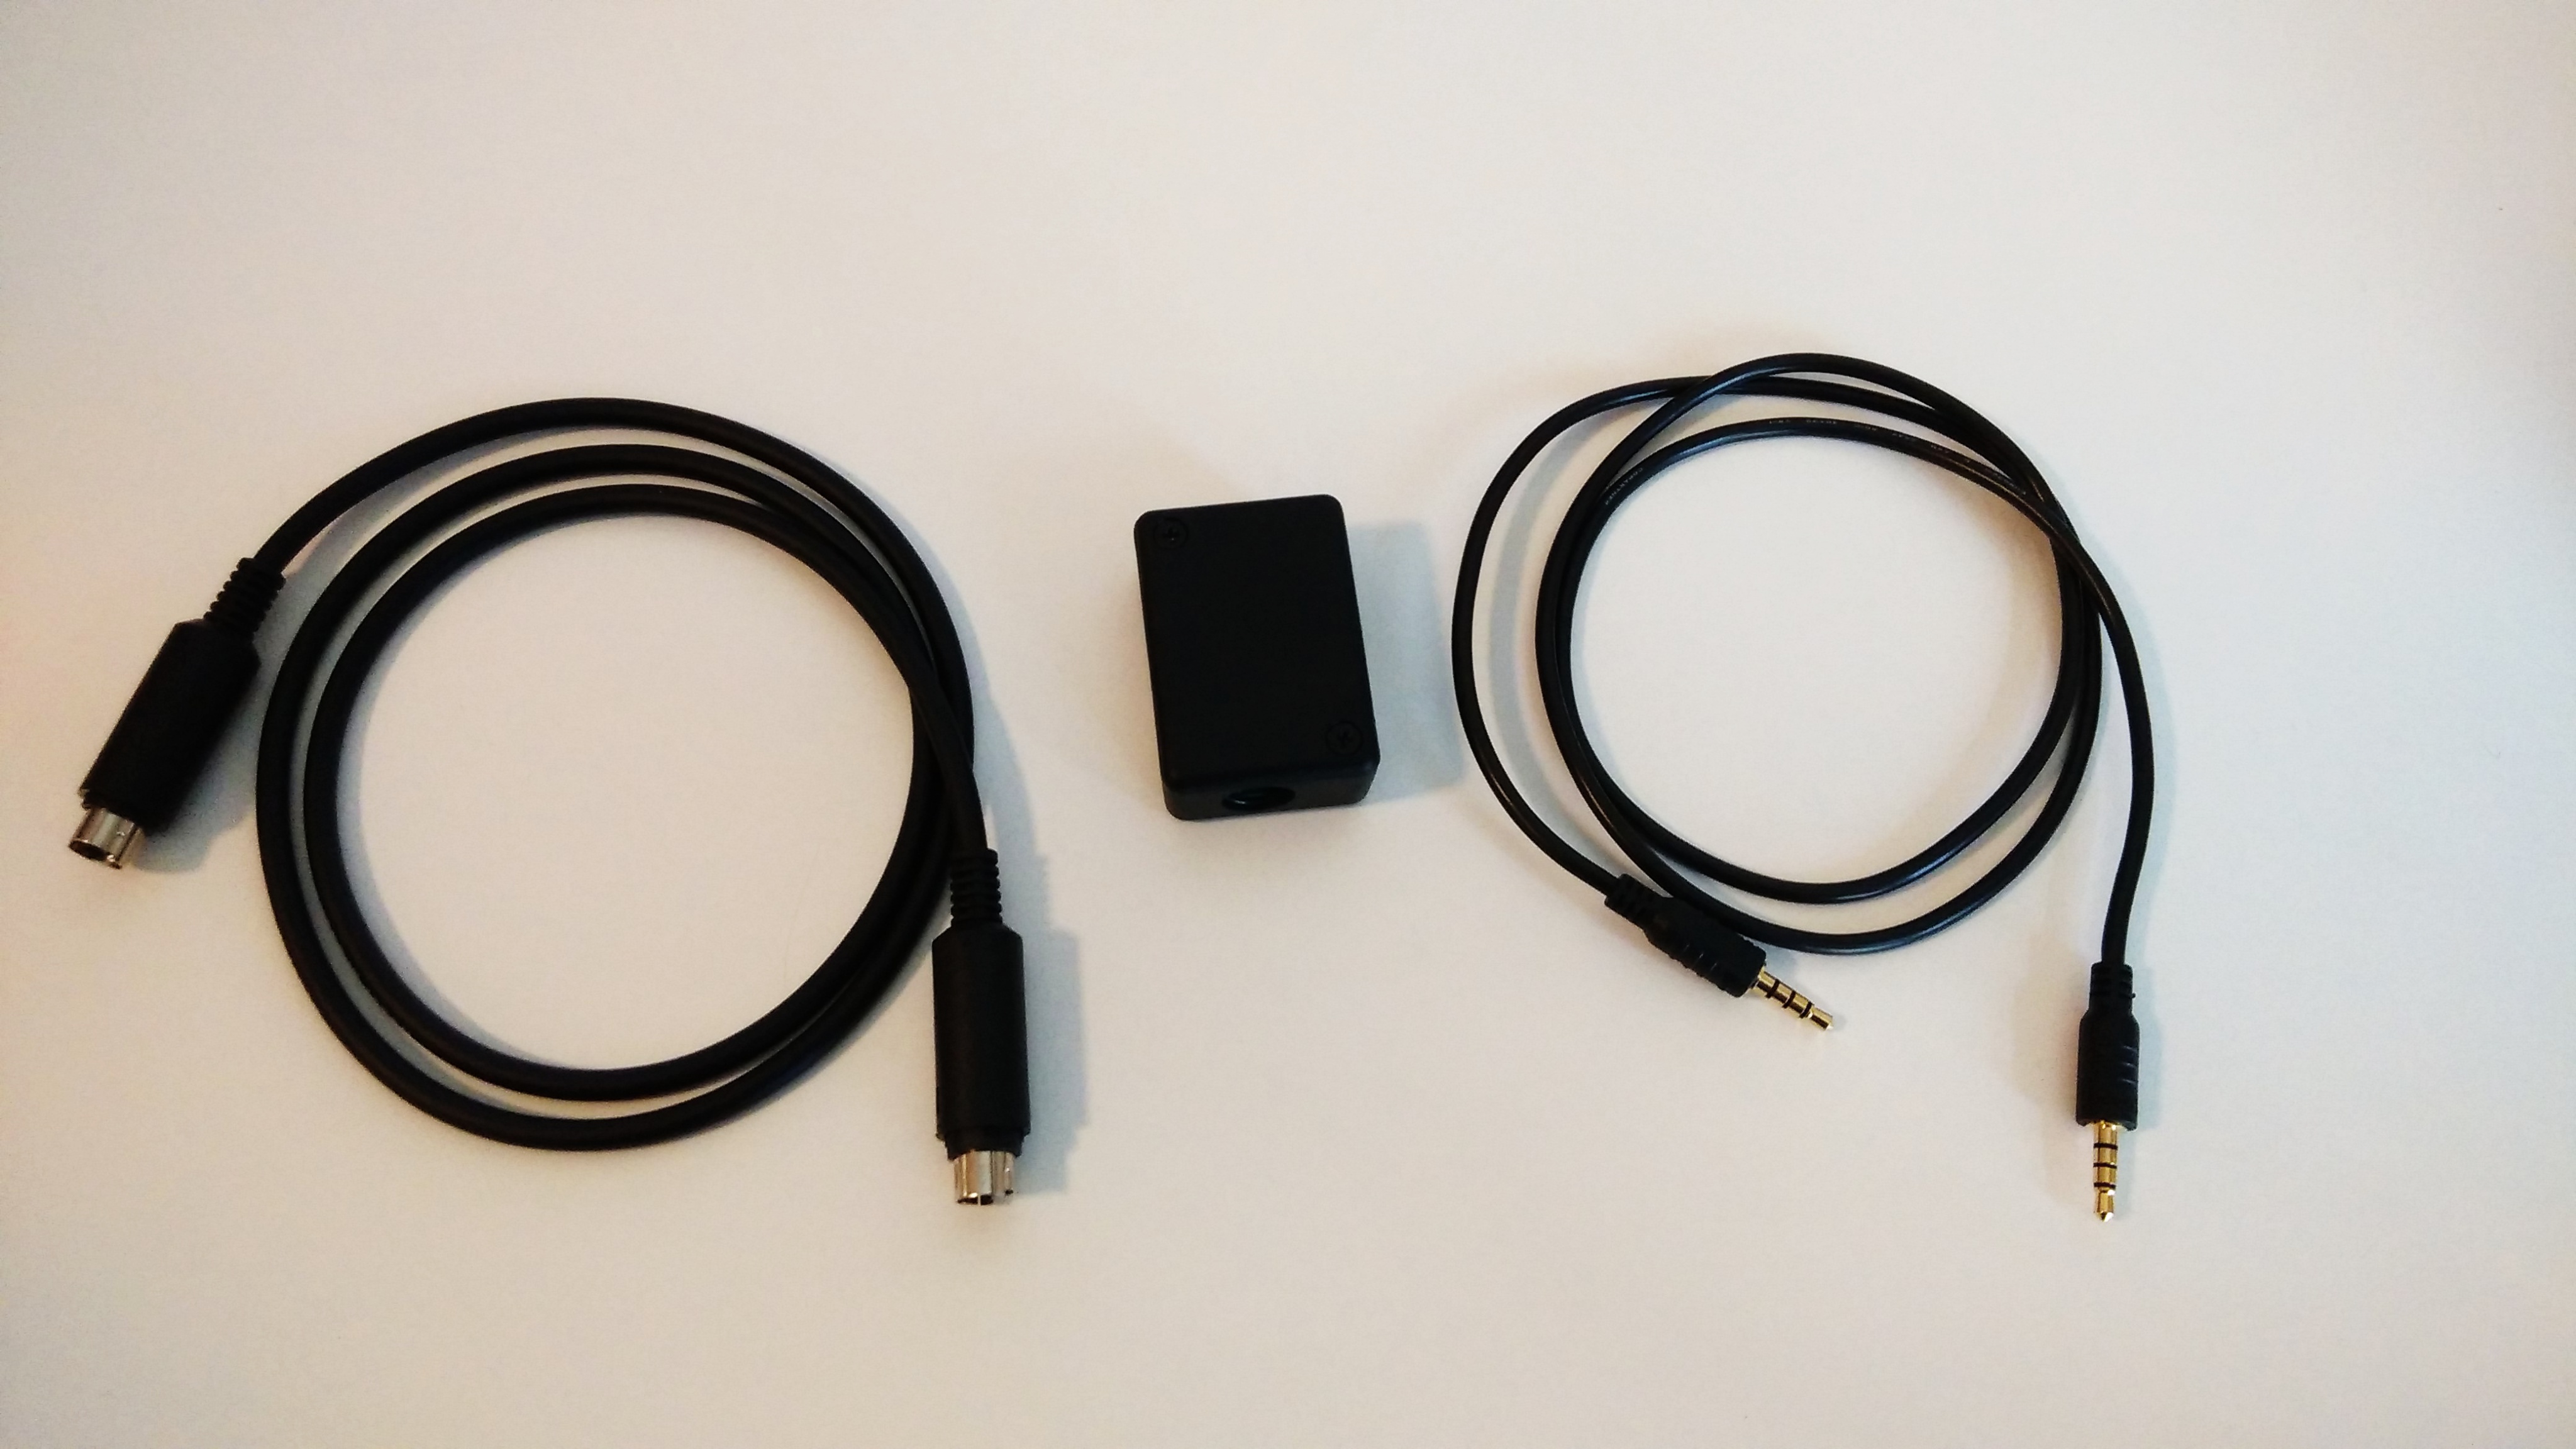
WolphiLink Interface + 6pin mini DIN cable & 4pin 3.5mm cable
Getting started for operation
Even if the hardware is still on its way to you there are plenty of things you can do to prepare for a smooth start. First of all a couple of transceiver settings need to be adjusted. In case of a Yaesu FT-857D those would be:
– Menu 38 “DIG MODE”
– Menu 75 “RF POWER SET”
From what I have experienced most operators choose “USER-U” (user defined, upper side band) in menu 38. Since all digital modes – except RTTY – utilize USB this setting turned out to be the best. When it comes to RTTY – which is usually operated in LSB – there is the possibility to switch the mark- and space frequency from within the app.
When it comes to the power output I would not suggest to transmit at full power. Keep in mind that digital modes and SSTV – in contrast to SSB or CW – constantly utilize the maximum adjusted power output. Imagine you are on a portable activity at the height of summer doing a time-consuming SSTV transmission at 100W. Can you already hear the finals screaming, HI? Better adjust the value to somewhere between 50 to 75 depending on ambient temperature.
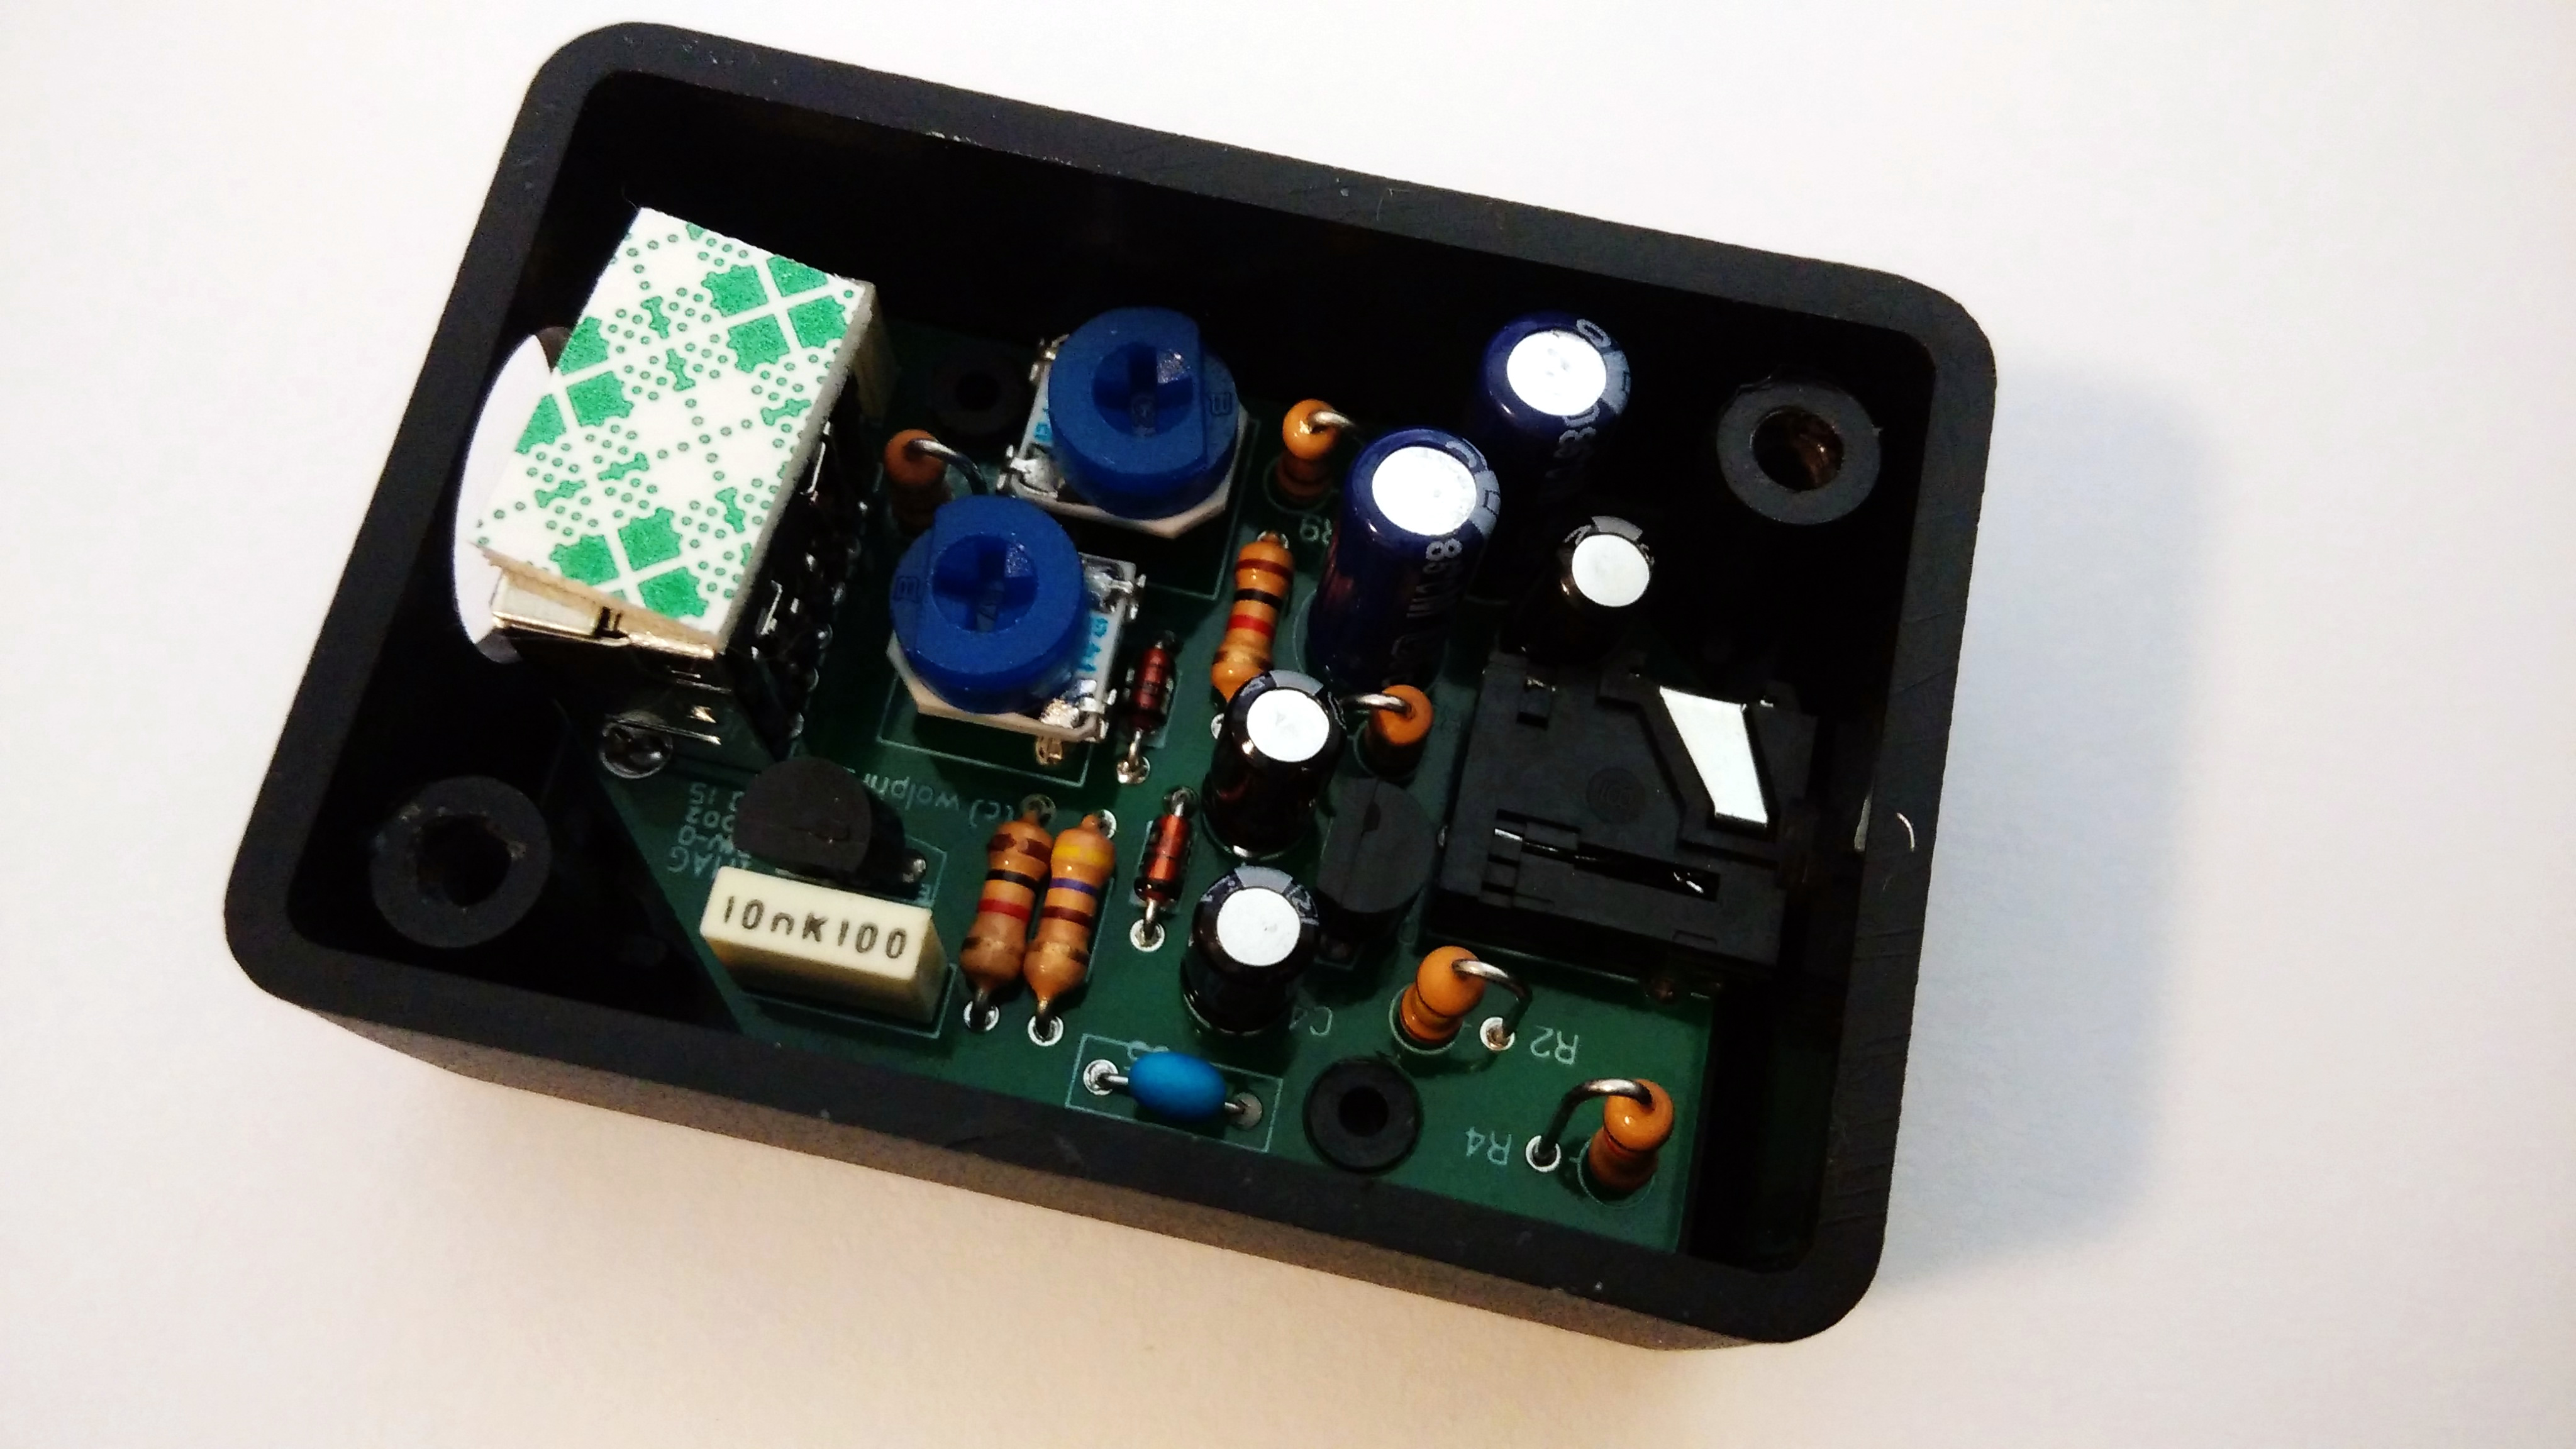
Inside the WolphiLink interface: Note the two potentiometers which are used to adjust RX and TX gain.
Speaking of ambient temperature you might also consider upgrading your TRX with a temperature compensated crystal oscillator (TXCO) in order to minimize frequency drift. Those are available on eBay for as low as 15 to 20 USD and have turned out to do a great job.
Another thing that has to be taken care of prior to the first digimode operation with the WolphiLink interface is the adjustment of the app settings. First and foremost personal data (callsign, name, age, locator, etc.) has to be entered. Next, make sure that the pre-defined macros are convenient and modify them according to your “QSO habits”. My macro set for RTTY looks like this:
Checking whether frequency is occupied
<START> QRL? DE <MY:CALLSIGN> <STOP>
CQ-Call
<START> CQ CQ CQ DE <MY:CALLSIGN> <MY:CALLSIGN> <MY:CALLSIGN> PSE K <STOP>
Requesting another call if unable to copy
<START> QRZ QRZ QRZ DE <MY:CALLSIGN> <STOP>
Exchange 1 – Intro
<START> <HIS:CALLSIGN> <HIS:CALLSIGN> DE <MY:CALLSIGN> MNI TKS FER CONTACT.
UR RSQ 599 599
MY NAME IS <MY:NAME> <MY:NAME>, AGE: <MY:AGE>, LIC: 2015
MY QTH IS <MY:QTH> <MY:QTH>
LOCATOR: <MY:LOCATOR> <MY:LOCATOR>
HW CPI? BTU <HIS:CALLSIGN> DE <MY:CALLSIGN> PSE KN <STOP>
Exchange 2 – Technical Info & QSL
<START><HIS:CALLSIGN> DE <MY:CALLSIGN>
TKS FOR INFORMATION, DR <HIS:NAME>
TRX: <MY:RADIO>
ANT: <MY:ANTENNA>
PWR: <MY:POWER>
QSL VIA BUREAU, DIRECT, LOTW, EQSL (AG) & QRZ.COM
SO BTU DR <HIS:NAME> = <HIS:CALLSIGN> DE <MY:CALLSIGN> KN <STOP>
Exchange 3 – Outro
<START><HIS:CALLSIGN> DE <MY:CALLSIGN>
TKS SO MUCH FOR THE QSO, DR <HIS:NAME>!
BEST 73 FROM AUSTRIA ES HPE CUAGN!
<HIS:CALLSIGN> DE <MY:CALLSIGN> SK <STOP>
Calling a station
<START> <HIS:CALLSIGN> <HIS:CALLSIGN> DE <MY:CALLSIGN> <MY:CALLSIGN> <MY:CALLSIGN> PSE K <STOP>
Exchange (short)
<START> <HIS:CALLSIGN> DE <MY:CALLSIGN>
UR RST 599 599
MNI TKS FER QSO! BEST 73 ES HPE CUAGN!
<HIS:CALLSIGN> DE <MY:CALLSIGN> SK <STOP>
As soon as the postman hands over the precious merchandise to you all that is left to do is to connect the WolphiLink interface with your Android device (4pin 3.5mm cable) on the one end and with your TRX – in this case: Yaesu FT-857D – (6pin mini DIN cable) on the other end.
Before you start the transceiver make sure that you have muted all notification sounds, ringtones, etc. on your Android device. For me, the default interface RX and TX settings work fine but just in case check that with another OM and turn the potentiometers accordingly.